Showing posts with label sugarfree. Show all posts

Tuesday, March 19, 2013

Greek Yogurt Breakfast Tart

One of the great things about working with a gaggle of 20-something women: the magazines that clutter the break room, nurses' station, and nursery. Some people use trashy television to decompress--for me, it's the glossy page.  I never finish the love quizzes or follow any of the make up advice, but I usually find inspiration in the recipe section--and yes, I am that person who rips the recipe page out of the back and keeps you from finishing the article about some woman's harrowing experience with credit card debt or a baby switched at birth. And that, my friends, is where we found this guy:


The good people at Better Homes & Gardens came up with this Greek yogurt tart with a cornflake crust.  It's quick, painless, and you can do the whole thing in one bowl (which is a big plus for the queen of leaving dirty dishes around).  This crust is DELICIOUS and I will definitely use it again for no-bake fillings.  The filling itself ends up tasting like set vanilla yogurt, as the gelatin robs the Greek yogurt of its creaminess--so this is definitely tasty but not a gamechanger. Next time, I will probably add some cream cheese or goat's cheese to keep the creaminess (maybe even use the filling from this pie), but this would be a great addition to any brunch gathering as is.

Greek Yogurt Tart with Cornflake Crust

Ingredients

  • 1 1/4 c crushed cornflakes, which took me about 3 c whole corn flakes (Arrowhead Mills makes a gf/sf version)
  • 1/3 c butter, melted
  • 3 TBS packed brown sugar (I used coconut sugar)
  • 1 envelope unflavored gelatin
  • 1/4 c water
  • 1 1/4 c plain Greek yogurt (FIBBYDY)
  • 1/2 c milk
  • 1/4 c honey
  • 1 tsp vanilla
  • 1 medium orange
  • 1/4 c orange marmalade (optional)

Assembly
1. Preheat oven to 375F. Combine crushed cornflakes, melted butter, and sugar in a small mixing bowl. Press into the bottom and up the sides of tart pan with removable sides (if you don't have one, any tin pan will do, it just won't look as pretty). Bake for 8-10 minutes, until golden brown. Set aside to cool.

2. Put water in a small microwave-safe bowl. Sprinkle gelatin over water, let stand for 5 minutes. Microwave on high for 20 seconds (stir at halfway point), or until gelatin is dissolved.  In a separate bowl, whisk together yogurt, milk, honey, and vanilla. Whisk in gelatin/water until completely combined. Pour mixture into cooled crust. Chill for at least 4 hours, but overnight is preferable.

3. When ready to serve, peel orange and heat marmalade until just melted. Cut orange however you'd like and decorate the top of tart. Drizzle or brush marmalade over oranges. Serve and enjoy!
Read More


Wednesday, March 6, 2013

Bright Beginnings: Gf/Sf Blueberry Muffins

Yum a dum dum. The sun is shining, the birds are singing, and these blueberry muffins are a grainfree, easy-peasey way to feed a crowd. Thanks to Guilty Kitchen!

Sometimes gf/sf cooking can be an exercise in abstraction, as baked goods can easily become an interpretation of the intended treat rather than a version of it. These muffins, however, are the real deal and 
 I was impressed by how very recognizably blueberry muffiny they tasted.  I admit that coconut flour is a huge moisture suck, but the resulting teensy lack of moisture was not enough to stop me from eating three...a day.

When I was in seventh grade, I spent a few weeks learning html so I could build an awesome website on Geocities. I'm dusting off the ol' coding cap to upgrade Cooking Up Kefi--so bear with me as I figure out how to tweak the new template.

Gf/Sf Blueberry Muffins
Ingredients
  • 3/4 c coconut flour
  • 1/4 tsp salt
  • 1/4 tsp + pinch baking soda
  • 1/4 tsp cinnamon
  • dash nutmeg
  • 6 eggs
  • 1/3 c maple syrup
  • 1/3 c Greek yogurt (FIBYDY)
  • 1 TBSP vanilla extract
  • 1/3 c + 3 TBSP coconut oil, melted
  • 12 oz frozen blueberries (I used 10 oz and think the extra berries would have helped the moisture issue)

Assembly
1. Preheat oven to 350. Line muffin tins with paper or lightly grease each muffin hole.

2. Combine dry ingredients.

3. Add wet ingredients to dry mixture and stir until lumps are out--it won't be perfectly smooth, but it'll do.

4. Spoon into muffin tins until each is nearly full, as these guys don't rise too too much. Bake 25-30 minutes, or until you can stick a fork in them and it comes out clean.

5. Let cool completely before gobbling up.
Read More


Thursday, February 7, 2013

Solid Gold Sh!t

Dear Friends--

As you may have heard, I'm on the night shift for awhile.  I originally intended for it to be six weeks of cooking fun, but mostly I have been keeping up with the Kardashians and the other trashy television stars who show up after 2 am. I have gotten off the couch long enough to get a couple new recipes in the works, but nothing's been perfected yet except my memorization of the new Insanity infomercial in its entirety.

In the meantime, I've been gorging myself on what I call "Solid Gold Sh!t" (bonus points if you catch the Love Actually reference).  This is the foodgroup that consists of a whole bunch of semi- to very healthy ingredients put together in such proportions, quantities, or iterations that they lose most semblance of nutrition altogether.  Put simply: Solid Gold Sh!t is junk food that sounds healthy but probably isn't.

Some favorites:

SO Delicious makes gluten-free, no-sugar-added ice cream. The chocolate flavor is by far the best, though the mint chip ain't bad either.  The state of Virginia may outlaw "pinting and driving" soon, as I've been known to try and brave traffic while housing one of these puppies!
Probably my favorite treat on the planet right now, Coco-Roons have the texture of a delicious cookie and the sweetness of a real lemon pie. Sadly, these guys run about $8.99/package, and nursing just can't support the habit all that often... but a girl can dream.
These chips right HERE taste like corn chips, but the first ingredient is PEAS! I had every intention of making a superbowl taco dip with these but then got really lazy and just ate the whole bag. These guys are also BFKef approved, so you know they taste like the real thing.
Read More


Tuesday, January 15, 2013

Sweet 'n' Salty Almond Butter Cups

In the words of my dear friend GingerKef, "Wowowowowowowowowowow!" 

I've been eyeing all the iterations of homemade Reese's cups out there on the interwebs, but none have been exactly sugar-free--the recipes I've seen have called for some kind sugar for either the nut butter or the chocolate shell. That ends now.

I played around with these puppies last night, and was amazed to find how easy they really are.  BF Kef was HUGE fan and promptly enjoyed two of these fancy little treats. They're a little sweet, a little salty, and a delicious replacement for any Reese's lover.

You'll have lots of almond butter left over--keep it in a container at room temp and enjoy it on apples, bananas, toast, and everything else on which almond butter is awesome.


Ingredients
  • 2 c slivered almonds
  • 2 c unsweetened shredded coconut
  • 1/2 tsp vanilla extract
  • 1/4-1/2 tsp salt
  • 10oz bag of unsweetened carob chip (or dark chocolate over 50% if you prefer)
Assembly
1. Preheat oven to 350. Put an ungreased cupcake tin in the freezer.
2. Spread almonds out on a rimmed baking pan. Roast in oven for 10 minutes, until lightly browned.
3. While almonds roast, put coconut and in a food processor. Blend until buttery, which will take about 10 minutes. About half way through, add the vanilla extract to keep the mixer moving.
4. Once roasted, let almonds cool for 2-3 minutes, then add the nuts, 1/4 c of the carob chips and salt to the coconut/vanilla mix in food processor. Blend until the mixture resembles a loose nut butter. Check for taste, and add another 1/4 c of carob chips if you feel so inclined. Set aside.
5. Heat a deep pot of water to a low boil. Remove cupcake tin from freeze. Place remaining carob chips in a handheld pot small enough to hold over the boiling water.  Stirring very frequently, place the small pot over the hot water (but try to keep bottom from touching water) and allow carob to melt. This will take 3-5 minutes. 
6. Using a spatula, divide the carob between each cupcake hole--each one should get enough to cover the bottom completely. Move quickly so the carob does not re-harden (if it starts to get firm again, put back over the boiling water for a few seconds and stir). It will not be pretty. Then, use the back of a metal spoon to smooth out the melted carob and push some up the sides of the tin. Again--it will not be pretty, just do what you can.
7. Add about 1 TBS of almond butter to each cupcake holder and smooth. We liked these without a top layer of carob--but if you have any left over, go ahead and pour it over the almond butter to make a final layer of "chocolate." Put cupcake tin back in freezer for 15-30 minutes. Once frozen, remove from cupcake forms and let come to room temperature before enjoying.
Read More


Monday, December 3, 2012

Chocolate Chestnut Pie

Chestnuts and figgy pudding are two of a kind. Everyone sings about them, but no one actually eats them. Always a bridesmaid, never a bride.

Luckily for chestnuts, Thanksgiving at the Kef Household lets them shine once a year--MamaKef has always loved adding chestnuts to her stuffing (though I'm sad to report I have yet to see her roast them over an open fire).  This year, we also threw some chestnuts over our roasted sweet potatoes to a spectacular result.  And this got the Kefwheels turning...

What else can we do with these creamy, delicious treats?

What we have today is a subtle, rich pie that ups the ante and will ensure that chestnuts get more respect than just a passing Carol reference.  A more sophisticated version of a diner chocolate mousse pie, it's sure to please anyone who makes it to your holiday buffet.  It is most definitely not a traditional pie--but I'll bet it comes back year after year, anyway.

Sorry, figgy pudding-- maybe someone will actually eat you next year.

I adapted this recipe, whose pictures are nicer.
Ingredients
     --1 can (15 oz) chestnut puree
     --1 bag (9 oz) unsweetened carob chips (if you want to use chocolate, use dark)
     --1 and 3/4 sticks of butter (room temperature), cut into small pieces 
     -- 2 TBS whiskey, cognac, or dark rum
-------------
 --1 c almond meal
--1/2 c coconut flour
--1/2 c carob powder (or cocoa powder)
-- 1 tsp baking soda
-- 2 eggs, beaten
-- 1/8 c honey or maple syrup (more or less, to taste?
-- 1/2 tsp vanilla extract
-- 3 TBS butter, cu into small pieces and softened to room temp 
--OR baked pie crust of choice (Try this pistachio crust)

Assembly
1. For the crust: if you're using your own crust, assemble and bake as directed. Otherwise, preheat oven to 325.  For the sugar-free, gluten-free cookie crust, combine both flours, carob/cocoa powder, and baking soda. Mix well. Add the wet ingredients except the butter and mix until combined. Then add the butter in small pieces, kneading with your fingers until you have a cohesive dough.

2. Press the dough into a buttered pie pan to form the crust. If you don't need all of the dough, use the extra to make cookies- you can use that for a topping. Use a fork to poke holes all over the crust and bake for 9-10 minutes, or until middle is set. Do not overcook- the dough is very dark so it will be hard to tell that it's burnt! Remove from oven and let cool completely.

3. To make the filling, fill a large sauce pan 2/3 full with water and heat over med-high.  Put the carob chips in a small metal bowl or smaller pot and hold over the heated water (but don't let bottom touch water or chips will burn).  Stir constantly to spread heat evenly.  

4. Once melted,  remove from heat and mix in butter, a piece or two at a time, so that it melts into the mixture.

5. Add chestnut puree and mix until combined.  Add vanilla and liquor. Taste mixture and if desired, add more vanilla to sweeten.

6. Pour mixture into pre-made crust and cool in fridge for at least 4 hours (overnight if you have the time).  Use a spatula to even out the top (which I clearly did not do in the above picture).
Read More


Saturday, October 20, 2012

Maple Apple Frangipane

The windows are open, autumnal sunshine is pouring into my kitchen, and the sound of the Howard Homecoming is echoing down the block--the perfect day to put freshly-picked apples to use!

In the beginning of September, I messed around with this thing called frangipane and the results were underwhelming.  I swore not to be outdone by the French and their delicacies (NB: yes, the word "frangipane" is clearly Italian, but Wikipedia tells me it used to be "franchipane," which is apparently French... so I can still blame the fussiness of this almond filling on the French! Sorry, Sarkozypoo!) and I have finally circled back around to conquer this beast.

And conquer it I have.


Let's back up. Earlier this month, I met CousinKef and BabyKef for some fun fall activities that resulted in about 20 lbs of apples sitting in my kitchen waiting to be transformed into autumnal treats.

Why, yes, that IS what 19.3 lbs of apples look like!
Flash forward about two weeks, and we're in spinning class on a beautiful Saturday morning (why I didn't just ride my damn bike in this gorgeous weather is neither here nor there).  The way-too-peppy-for-8am instructor is talking some mess about how good the burn feels when it hits me: I am going to apple-ize the frangi-whatever and it is going to be delicious.

The result was amazing! This may be the creation I am most proud of since I made those out-of-this-word pork chops. There are three components, but none is particularly time consuming. I simplified the process by using a pre-mixed gluten-free pie crust (it is not a pie crust mix, per se, as you still have to add several ingredients--it just pre-combines all the weird flours you have to buy for $8.99/cup into one $3.69 mix and is enough for two pies. Awesome.)

I came, I saw, I frangipaned.  You're welcome.

Apple Frangipane With Maple Glaze
Ingredients
  • Pie crust of your choice. I used the Glutino Gluten-Free Pantry Perfect Pie Crust Mix (which requires you to add baking powder, egg, butter, shortening, water, and vinegar). You can do whatever you'd like).
    ---
  • 2 c almond flour/meal
  • 2 TBS liquor of choice--dark rum or cognac would be good, I used Godiva chocolate liquor because THAT is what your girl keeps around for emergencies, apparently
  • 1 stick of butter, cold and cut into TBS portions
  • zest of 1 lemon
  • juice of 1/2 lemon
  • 1/3-1/2c honey
    ---
  • 1 large or 2 small sweet apples, peeled and sliced thinly
  • 2 TBS butter, melted
  • 6 TBS maple syrup (the 100% real stuff--please do not let me find you using IHOP brand or some crap like that.)
  • 1 tsp cinnamon

Assembly  
1. Preheat oven to 425. Whatever pie crust you are using should be cold, so if you made it yourself, put it in a pie or tart pan and let chill in freezer. Once it has chilled for about 20 minutes, poke fork holes all over it and cover the tips with either a wreath of tin foil or a pie-crust shield. Cook until crust is just turning golden brown, which will depend on the crust but will probably take about 12-15 minutes. Set aside to cool. Reduce oven heat to 375.
2. Combine almond flour, liquor, lemon zest, lemon juice, and honey (start with 1/3 c honey and proceed to step 3. If at the end of step 3 the frangipane is not sweet enough for you, add honey and mix until you like the taste.)  A food processor or blender would be easiest, but if you do not have one then stirring vigorously will be just fine. 
3. Cut in the butter one TBS at a time until a thick, gooey paste has formed--again, I did this in my food processor and it took about 1 minute, but you can do it the old-fashioned way with a pastry blender or potato masher. (If you want to add more honey, now is the time.) Set aside.
4. To make the glaze, mix together melted butter, maple syrup, and cinnamon. Put thinly-sliced apples in a bowl and toss with maple glaze. 
5. Place the frangipane (almond mix) in the cooled pie crust and level off with a rubber spatula.  Arrange soaked apple slices however you would like on top in a single layer. Pour remaining maple glaze evenly over the tart. You will probably have a few gooey apple slices left over--eat them!
6. Cook tart until center is firm to touch, it took my little oven about 40 minutes--just start checking around 30 minutes or so. Let cool, enjoy! For added sweetness, whip up a half batch of maple glaze and drizzle a few drops on pieces immediately before serving.
Read More


Friday, September 28, 2012

Pumpkin Bread Two Ways

MamaKef makes just about the most delicious pumpkin bread on earth (and it's my Aunt Carole's recipe, so we're really talking about a family affair here). Strangely, I have no picture of it, despite knowing that I have photographed it at every Thanksgiving and Christmas since 1999.

What I do have a picture of, however, is the imitation version I made for my first shift EVER as an RN (yowza!).  You already KNOW this gluten-free sugar-free pumpkin bar is delicious, because no sane person would ever bring a sub-par treat into the nurse's station of a very busy unit without being 100% positive that it would be gobbled up and that she would have 15 new friends and colleagues who want to make her transition to nursing easier... right?

Right. So, please enjoy both the gf/sf version AND the full o' flour version--they're both delicious and easy-peasey recipes that are proven crowd pleasers (just ask Nurse Ratchet!).

 Gluten-Free, Sugar-Free Yumcito Pumpkin Bars
Ingredients
--3/4 c pumpkin puree
--3/4 c almond butter (you could prob use any nut butter--just make sure it does not have sugar in it if what you want is a sugar free dessert!)
--1/2 c honey 
--3 eggs
--2 tsp cinnamon
--1 tsp ground ginger
--1/2 tsp nutmeg
--1/2 tsp ground cloves
--2 tsp vanilla extract
--1 tsp baking soda
--1/2 tsp salt 

Assembly 
1. Preheat oven to 350. Grease your pan--I used a 9-inch shallow disposable tin for easy transport--but a cake round, cupcake tin, or casserole dish would work, too, as long as you keep them thin. I would say NOT to use a loaf pan because I do not think the baking soda will do enough to make the batter rise.
2. Combine all the ingredients in a bowl and mix well.
3. Pour into pan. Bake for about 22 minutes, or until edges are brown and center is set. (In my little oven the edges looked burnt before the center set, but those turned out to be the best pieces!)

---
KefFamily's Favorite Chocolate Chip Pumpkin Bread
Ta Da!

Ingredients
  • 1 cup salad oil
  • 2/3 cup water
  • 1 16-oz can Libby's pumpkin
  • 2 eggs
    --
  • 3 cups sugar
  • 3 1/2 cups flour
  •  1 1/2 tsp  cinnamon
  • 1 1/2 tsp nutmeg
    1 1/2 tsp salt
  • 2 tsp baking soda
  • 12 oz bag choc chips
Assembly 
1. Preheat oven to 350. Grease two loaf pans well (these can also be made as muffins if that suits your fancy).
2. Mix the wet ingredients together.
3. Add in the dry ingredients - except the choc chips.
4. After everything is well blended, stir in the chocolate chips.
5. Pour into 2 well greased loaf pans and bake for approximately 1 hour and 10 minutes (I always start checking at about 45 minutes but it really does take this long).
Read More


Thursday, September 27, 2012

A Birthday Cake

So, there I was. The morning of my twenty-seventh birthday and the gluten-free, sugar-free, four-layer devil's food cake I had made myself had just slid right off the cake plate and now resembled a Leaning Tower of Sugar-Free Piza. I know-- happens to EVERYONE.

Let's back up a bit. I had spent quite a few weeks researching and thinking about the perfect birthday cake for someone of my palate (which is to say, I spent all my waking moments looking for a cake was that "healthy" but tasted decidedly UNhealthy).  I tinkered about in the kitchen (ok fine, I made and ate entire batches of test cupcakes) and had finally found the perfect recipe. Then I just happened to stumble upon some gf/sf marshmallow fluff, and got the idea to layer the cake and throw some strawberry jam in there. What could go wrong?

Well. Turns out that when your "fluff" is made of brown-rice syrup, the consistency is less sticky and more slippery. So if you think you can make a four layer cake, add a jam to it, and get it in the fridge to set before the whole thing falls apart, you are wrong. Dead wrong.

So like I was saying--my masterpiece cake had just turned to some kind of rice syrup mess and my party was only a few hours away.  My first instinct was to cry and cancel the party, but then inspiration struck--TRIFLE! If you don't know, a trifle is a dessert layered in a round high glass dish, and usually alternates some kind of creamy sauce, a cake, and a fruit jam... basically, a ruined gluten-free, sugar-free cake dripping in "fluff" and strawberry jam. So I scraped that puppy right off the plate and into my handy-dandy trifle dish... et voila! I had a birthday cake.


This guy really was as good as I had hoped--the cake is full of chocolatey flavor and texture is as close to regular cake as I have ever baked. The "fluff" was great as a layering/moistening tool (once I got it in the dish, that is), but it is the one substance in the universe actually SWEETER than marshmallow fluff, so use carefully! I used the Babycakes German Chocolate Cake recipe as a guide for proportions.

A Devil's Food Trifle Worth Making Twice

BabyKef and le trifle
Ingredients
--3 c rice flour (I used brown)
--3/4 c potato starch
--3/4 c +1/3 c unsweetened cocoa powder
--1.5 TBS + 3/4 TBS baking powder
--3/4 tsp baking soda
--1.5 tsp salt
--1.5 c + 3/4 c agave nectar
--1.5 c coconut oil, melted
--1.5 c unsweetened applesauce
--1/3 c vanilla extract
--3/4 c hot water
--1 egg
--marshmallow fluff for layering (I used a whopping 2 cans of this stuff)
--your choice of strawberry jam (I made my own by stewing strawberries and honey--it's super easy, just google or buy)

Assembly
1. Preheat oven to 325. Grease two cake rounds (mine were 8-inch).
2.  Whisk together flour, potato starch, cocoa, baking powder, baking soda, and salt.  Add the agave, coconut oil, applesauce, and vanilla and mix well.  Add hot water and mix until fully incorporated, batter will be grainy.  Add egg, mix again.
3. Divide batter between the two pans. Bake for about 30 minutes, rotating once. The cake is very dense, so be sure to perform toothpick check. Once the toothpick comes out clean, let cakes cool completely (about 45 minutes). Then, cut horizontally through both cakes to create four layers.
4. Pour a layer of jam on the bottom of your trifle dish--it shouldn't be gobs and gobs, but it should be generous. Put one layer of cake down, breaking it if you need to--just get it into oneish layer. Put a big ol' dollop of fluff, then some more jam. Repeat again, ending with cake on top.
Read More


Tuesday, September 11, 2012

Butternut Squash "Spaghetti"

I thought about not blogging today.  It seems strange to spend time thinking and writing about the banalities of butternut squash on a day with such looming significance.  

I didn't know anyone who was in the either of the Towers that day, nor did I know anyone in lower Manhattan.  Back then, the only people in my sleepy suburb who worked in the city were fire fighters and police officers, and so for our town the horror of the day grew more personal as time went by-- no one I knew had a parent who worked in the World Trade Center, but we all knew parents who went down to Ground Zero for weeks at a time, often unable to communicate with their families during those long shifts of sifting through the remains of what we knew.  Our attempts at efficacy reflected our bizarre new reality: the blood drive organized by the senior class was cancelled when it became clear that there would be few survivors; instead we donated bagged lunches to the first responders and clean-up crews, who would be in harm's way indefinitely.

When I left New York to attend college in DC, I would spend four September 11ths feeling a strange guilt for not being in New York, not living out the grief I felt with the people closest to the loss.  Perhaps most difficult for me was the strange brand of grief I watched take shape in the rest of the country, outside New York, where it was some twisted trend to "out-9/11" the person next to you in order to validate your grief.  Five years after the attacks, there were still no words to name adequately the mourning we felt for the loss of our old world order, which left many who did not have the name of a lost loved one to mourn grasping for something that would make our sadness comprehensible.  It wasn't enough just to have watched the crumbling of some 3,000 lives: soon, everyone had a story of someone they knew who had run out of Lower Manhattan, been in the Pentagon, or would have been on one of those flights, if not for some divine intervention.  I never felt able to say to anyone but my roommate, who was also from a small suburb of the city, that I felt incredibly empty, that I still couldn't watch footage from the day without weeping, or that it was difficult to make it through this day every year.  Not because any one thing had changed in my life, but because everything was, in some way, completely different.

And so today I write about butternut squash spaghetti.  There is no link between this dish and this day, nor do I have a clever transition from the above emotions to the below recipe.  It seems that this is what we do--note the date, feel the sadness, move on to the next topic. 
--- 
Butternut Squash "Spaghetti"

Ingredients 
-- 1 butternut squash (a medium will serve 2), peeled
-- 3 cloves of garlic, minced
-- 1.5 TBS butter (olive oil would prob work also)
-- Fresh basil, to taste (optional)
-- Whatever tomato sauce you like (I love this smokey marinara)

Assembly
1. Using a julienne peeler (which are widely available for about $5 at most grocery stores--they look like a regular "Y" peeler with teeth), shred the skinned butternut until the seeds in the bulb are exposed. Do not make this difficult: hold the butternut vertically and move the julienne peeler down it.  This will make "noodles." Collect them in a bowl.
2. Heat the butter until it is melted over medium heat in a saucepan big enough for your "pasta." Add the minced garlic and let that sizzle for 2-3 minutes.
3. Add the squash.  Using tongs if you've got 'em and a spatula if you don't, move around the pasta so spread out the butter and garlic.  Then, let it sit over medium-high heat for 10-13 minutes, turning occasionally so all the "noodles" get cooked.  You'll know it's done when it has the consistency you like your pasta to be.  Throw the basil in and let it wilt.
4. Top with your favorite tomato sauce and enjoy.
Read More


Tuesday, August 21, 2012

Beet Hummus

My love affair with beets is no quiet romp in the hay--and with BF Kef gone for a little vacay of his own, I don't even have to hide my extracurricular activities.  The beets and I have gotten hot and heavy, and this little lovechild has popped up to play.

Today we're working with golden beets, ginger, and yogurt, all of which come together to make a delicious dip with all the consistency of hummus but none of the spelling confusion. Enjoy!


Golden Beet "Hummus" Dip

Ingredients 
- 3 med golden beets, peeled, and chopped (without greens)
- 2 tsp garam masala
- 1.5 inch piece of ginger, peeled and grated
- 1/4-1/2 c yogurt (fage best, everything else ok)
- olive oil as needed


Assembly  
1. Preheat oven to 350. Toss chopped beets, ginger, with olive oil. Loosely wrap in tin foil in a single layer.  Cook until beets are soft all the way through, about 20-30 minutes.
2. Allow beets to cool. Puree in a food processor with yogurt until smooth, adding olive oil to reach desired texture.
  
Read More


Tuesday, July 17, 2012

Carrot Ginger Salad

I have fallen in love with the Carrot Ginger salad available for $7.99/lb on the Whole Foods salad bar.  While I was studying for boards, I could talk myself into buying and devouring half a pound in the name of time-efficient brain food... but boards are no more. So, this morning I endeavored to replicate it myself.

I LOVE this easy summer salad--it's sweet and tangy, which is increasingly finding a preferred place on my palate. It took me about 6 minutes to make, and this recipe easily makes enough to bring to a party, picnic, or potluck.  Enjoy!

 In other news (mostly because I took a vertical picture but don't have enough preamble to fill this space), the annual Chef Kefi and JetSet Kef trip (aka: Ferragosto) is a mere fortnight away, which means shenanigans and culinary delights will abound!


Ingredients 

For the salad:
  • 5 carrots, washed and ends chopped off 
  • 1 zucchini, washed and ends chopped off 
  • 2.5 inches ginger, peeled 
  • 4 cloves garlic
For the dressing: 
  • 5-6 TBS olive oil
  • 5-6 TBS sherry vinegaretter
  • 1.5 TBS honey

Assembly
1. Grate your carrots, zucchini, ginger, and garlic however you like--grater, food processor, pre-purchased, whatever.
2. In handfuls, squeeze out extra water from carrots and zucchini. DO NOT SKIP THIS STEP.
3. Combine grated vegetables in a big bowl.
4. Immediately before serving, combine olive oil, sherry, and honey in a small bowl and mix furiously with a fork. Pour over vegetables and serve.
 
Read More


Tuesday, June 12, 2012

Cauliflower, Chickpea, and Coconut Curry

Clearly, "C" is not just for cookie.  Today we have a delicious, quick, and easy curry--no more into needed!

Ingredients
  • 1/2 head cauliflower, chopped
  • 1 med zucchini, chopped
  • 1 can of chickpeas, drained
  • 4 TBS olive oil
  • 3 tsp garam masala 
  • 1 tsp ground ginger
  • 1.5 tsp chili powder (add more for spicier curry)
  • 1/2 onion, diced
  • 1 inch grated ginger (or ground)
  • 2 cloves garlic, minced
  • 1 can fire roasted diced tomatoes
  • 1 can lite coconut milk
Assembly 

1. Preheat oven to 350. Toss cauliflower, zucchini, and chick peas in 2 TBS olive oil.  Then add HALF the garam masala, all the ground ginger, and HALF the chili powder. Put vegetables on a baking sheet and cook uncovered for about 20 minutes, until tender.

2. While the vegetables are roasting, heat remaining oil and spices over medium heat for about 1 minute, stirring to distribute spices evenly.  Add onions and garlic and saute until fragrant, 5-7 minutes.  Onions should be soft and covered by oil/spices, but not browning from heat.
3.  Add tomatoes to onion mixture.  Stir around and allow to cook together 3-5 minutes, stirring occasionally.  
5. Add coconut milk, stirring to combine.
6. Add roasted cauliflower mix.  Allow the whole mixture to come to a boil, then lower heat and let simmer for 10-12 minutes.  
7. Curry will taste best if you let it cool--the flavors come together as temp goes down.


Read More


Monday, June 11, 2012

Homemade Fruit Roll Ups So Simple a 5-Year Old Can Do It

Hi, I'm Chef Kef and I'm berry-aholic. 

The whole world seems to conspire against my work to contain my berry habit--global climate change has created a nearly 6-month berry "season," that beautiful wall of red, blue, and black is ALWAYS the first display in a grocery store, and pints of those cancer-fighting rock stars seem to be on "buy-one-get-one-free" sales just about every other week.  So I buy one (and get one) and try my damnest to eat them before they turn into a refrigerator science project.  As it turns out, strawberry curry does NOT make for a delicious dinner and I can't eat berry-topped yogurt with every meal, and so they get a little mushy and moldy before I can finish them all.  Then it's time to grocery shop for the next week and guess what? It's deja vu all over again.


Lucky for me, the tender angels I babysit all happen to be adventurous eaters who also like a project or two.  So last week one of the KiddyKefs and I took on the task of homemade fruit roll ups to get rid of my extra strawberries before they went bad.  What resulted were good enough that KiddyKef 1 and 2 ate nearly the whole batch (which is admittedly not that big--but the point remains), and as KiddyKef 2 astutely realized-- "Everything in these is healthy!" 

 Ingredients
--half a pound of strawberries*, stemmed and chopped, don't worry about uniformity
--one green apple*, peeled, cored, and chopped
--juice of one lemon
--1/4c water
-- 1 TBS agave

** you can use any fruit in any amount you'd like- you really can't mess this up (but more fruit means add a bit more water). The margin for error is in the sweetening--remember that sweetness and flavor will increase after they get dried out, so I wouldn't add much more than another TBS of sweetener unless you are using WAY more fruit than shown above, especially if you're using naturally-sweeter fruits.


 Assembly
1. Throw chopped fruit, lemon juice, and water in a sauce pan over medium heat.  Bring to a boil, cover and let simmer for about 7 minutes. Stir occasionally. They will get stewy. At about the 5 minute mark, add the agave and stir around.
2. Remove from heat. Let fruit cool off. Preheat your oven to "Low" or 180F.
3. Puree your fruit--food processor is best, but since they're all stewy, you can mash the big pieces by hand if you want.
4. Spread the puree thinly and evenly on a lined baking sheet. I used a silicon mat, but I am told that the temp is so low that microwave-safe plastic wrap works as well- do you.
5. Cook in the oven until you get the texture you like--we cooked them at 190 for 5 hours and our batch came out closer to fruit leather than rollup-- so I think 180 for 5.5-6 hours would do the trick.
6. Cut with a pizza roller and enjoy.
Read More


Thursday, June 7, 2012

Pancakes, Chef Kef Style

In theory, things should have calmed down a bit in Keftown--nursing school is done, I'm unemployed, and summer is in full swing.

Instead, I'm feeling crazier than ever--searching for a job (anyone need a pediatric nurse?), training for a triathlon that's a month away, babysitting about 10,876 hours a week, and traveling to what feels like EVERY wedding on the Eastern seaboard this summer. In short, I've been eating at Sweet Green a lot.

A few weeks ago I came up with these guys--gluten-free, sugar-free pancakes that are probably--ok, definitely-- higher in calories than regular ones, but have a rich, distinctive flavor that makes up for blowing a calorie budget (1,800 is just a suggestion, anyway....right?). Anyway--I love the way the honey, soy, and coconut flavors come together, I hope you do too. 


Ingredients
1/2 c gluten-free flour


1/3 c coconut flour


2 eggs


1/4 c honey


3 TBS vegetable oil


6 TBS soy creamer (or more if you want more liquidy batter)


1 TBS baking powder
 
Assembly
 
1. Mix everything together, saving creamer/milk for last.  Dough will be very thick--this is okay.  If you prefer more traditional pancake batter, add creamer 1 TBS at a time until you reach desired consistency.  Raw batter will not taste great, as the GF flour has garbanzo bean flour which tastes horrible raw.

2. Cook in greased skillet over med-high heat for about 3 minutes/side.  Pancakes will rise up beautifully and fluffy because of the baking powder.

Enjoy!

Read More


Wednesday, May 2, 2012

The 50-Bite Macaroon

As a rule, I stay from anything described as "two bite"-- you know what I mean: those brownies/cupcakes/cookies sold in those round plastic things at the grocery store sized just small enough to keep you wanting more...and more...and more.  And you know why I avoid them? Because whoever calls something that good a two-bite anything obviously doesn't understand simple multiplication: if you eat ten, they are actually twenty-bite brownies. If you buy into this two-bite business, you're faced with the knowledge that you're consuming food packaged either by an idiot or by a control freak--and that's a risk I'm not willing to take.

But oooooo the macaroon. Often lumped in with their two-bite brethren, these coconut cookies are the definition of melt-in-your-mouth goodness. Since going off grains, these puppies have been god-sends to a texture-driven eater like me.  The problem is, I'm also twenty-bite kind of girl, and the first ingredients in macaroons are sugar, more sugar and, usually, butter, which runs the risk of turning me into a twenty-chin kind of girl.

So- here we have a cheap, easy, sugar-free version of the grocery store delight. They're pretty quick and yield about 2 dozen in a single batch--making them nearly fifty-bite macaroons. Somebody get the crane- you're gonna have to roll me outta here.


Ingredients
  • 5 egg whites
  • 1/4 tsp salt 
  • 2.5c shredded coconut (3c of the real stuff is $3.99 at Whole Foods--try to avoid imitation if you can)
  • 1/3c honey
  • 1 TBS flavored extract, like vanilla or almond
Assembly 
1. Preheat oven to 350. Combine egg whites and salt. Beat until stiff peaks form. (NB: This means that you use an electric or standing mixer on those puppies until the whites form a foam so sturdy that when you turn off the mixer and lift it out of the bowl, the peaks stay standing.  It will take 5-7 min on high speed.)

2. In another bowl, mix together remaining ingredients.  Then fold in egg whites, until full combined.


3. Scoop out cookies using a 1 TBS measuring spoon onto parchment-paper lined cookie sheet (press the dough firmly into the spoon, then tap them out forcefully).  They can be close together, as they won't spread out into each other.


4. Bake for 12-15 minutes, until macaroons are golden brown.  Let cool so they firm up--then enjoy!

Read More


Monday, January 30, 2012

Spinach, Zucchini, and Mint Tart- Gluten-Free and Delicious

As I mentioned a few posts ago, my cousin Joanna is brilliant.  A few weeks ago she treated me to an incredible lunch that really got my wheels turning: she used shredded potato to create a gluten-free base for a tart.  Inspired, I used the same idea to present one of my most successful original recipes-- a gluten-free spinach, zucchini, and mint tart with a sweet potato base.


Ingredients
  • 2 sweet potatoes
  • 2 zucchini
  • 1/3 lb spinach (this is one of those 150g plastic containers), washed
  • 1/4-1/3c fresh mint leaves
  • 4 garlic cloves, minced
  • 1/2c plain yogurt (Greek is best, naturally)
  • 1 jalapeno, seeded and diced (you can use half of one if you don't like spice)
  • 1.5 tsp grated ginger (a huge piece of ginger costs $0.37-- be serious, just buy it)
  • 1 TBS honey
  • 2 TBS olive oil, plus more for pans
  • 1 tsp lime juice
Assembly

1. Preheat oven to 400.  Liberally grease either two 8-inch pie pans or one 9x13-inch metal casserole dish.  Shred your sweet potatoes- this is most easily done with a food processor, but you could also use your peeler and just use what I will call "layered shavings."  Once you have your pieces, squeeze out the excess water.  Arrange in greased pans and so that you have a base that covers the bottom and about 1/2 way up the sides of the pan.  Push down to make as dense as you can.  This will not be pretty.  Bake uncovered for 30-40 minutes, until dry and browned, even burnt-looking.  This will be even less pretty.

2. Decrease oven temp to 375. Combine yogurt, minced jalapeno, 1 minced garlic clove, grated ginger, honey, 2 TBS olive oil (use only 1 TBS if you're not using Greek yogurt) and lime juice. Stir until mixed, set aside.

3. Puree zucchini, spinach, mint, and remaing 3 garlic cloves until smooth but not juicy.  I lightly grilled my zucchini first using very thin slices, but you can probably forgo this for a faster meal.

4. Combine vegetable and yogurt mixtures.  Pour into pre-cooked potato bases.  Cooking time will be somewhere between 25-40 minutes, depending on which dish size you used.  Middle should be set and not jiggly-- it is really hard to burn this, so if in doubt, give it another 2 minutes.

Read More


Friday, January 20, 2012

Resolutions in Action: Applesauce!

I was making this applesauce while writing yesterday's post about doughless pizza.  If I had finished the applesauce before the post, I would NEVER have wasted my Swagu joke on the pizza because this sauce has me swearing never to storebuy applesauce again--but, alas, you could only use a bad joke once.  

In the spirit of some serious multi-tasking, I was also mid-way through the BEST pep talk from my mom, who always seems to know when I need some tough love and when I just need my mom to tell me that I'm great.  So, it's only fitting that today you get a recipe PLUS a kefi story about MamaKef, making today's post a... kefcipe?

Every year, my mom would strap the KefSiblings, our friends, their siblings, and whoever else happened to be around into our cranberry Toyota Camry and schlepped us past the 8 apple farms within 10 miles of our house to THE BEST apple farm in our neck of the woods: Wright's Apple Orchard. We would wander the orchard for a few hours, compete over who found the "most perfect" apple, and inevitably recreate the rotten apple fight scene from The Wizard of Oz.  At this point, my mother would remind us of the sign we passed upon entering the orchard, which promises (and I quote) that those who steal fruit will be "shot on sight."  Not wanting to die at the hands of an overzealous apple farmer, we'd mosey back to the farm stand, eat some homemade apple-cider donuts that were made for us while we watched, get some homemade pumpkin ice cream to bring home, and then hit the road, the Camry all the heavier for the 10 pounds of apples and the 7 really-full kids we were now towing.


And then the kefi would REALLY get going.  My mom would get right to cooking up some apple crisp, and soon the house would smell like apples and cinnamon.  I don't think apple crisp was really ever anyone's favorite--the real fun was trying to steal a cinnamon-coated apple while MamaKef's back was turned (the butter and sugar topping didn't hurt, either).  To this day, the smell of baking apples ALWAYS makes me think of those afternoon cooking sessions post-orchard (and, frequently, post-being-sent-to-my-room-for-being-bad-at-the-orchard). 


Now that I've gotten all Little House on the Orchard on you, this one goes out to MamaKef, the original Apple Whisperer.  


Apple Sauce So Good You'll Smack Your Mama*

Ingredients:
  • 8 apples ( I used 4 Granny Smith and 4 Fuiji- but would have substituted the latter Macintosh if I could have found them this time of year) 
  • Juice of 1 lemon
  • 2 tsp cinnamon
  • 1 tsp nutmeg
  • 1 TBS honey (feel free to use more or less. Sweeter your apples, less honey you need)
  • 1/4c water 
Assembly

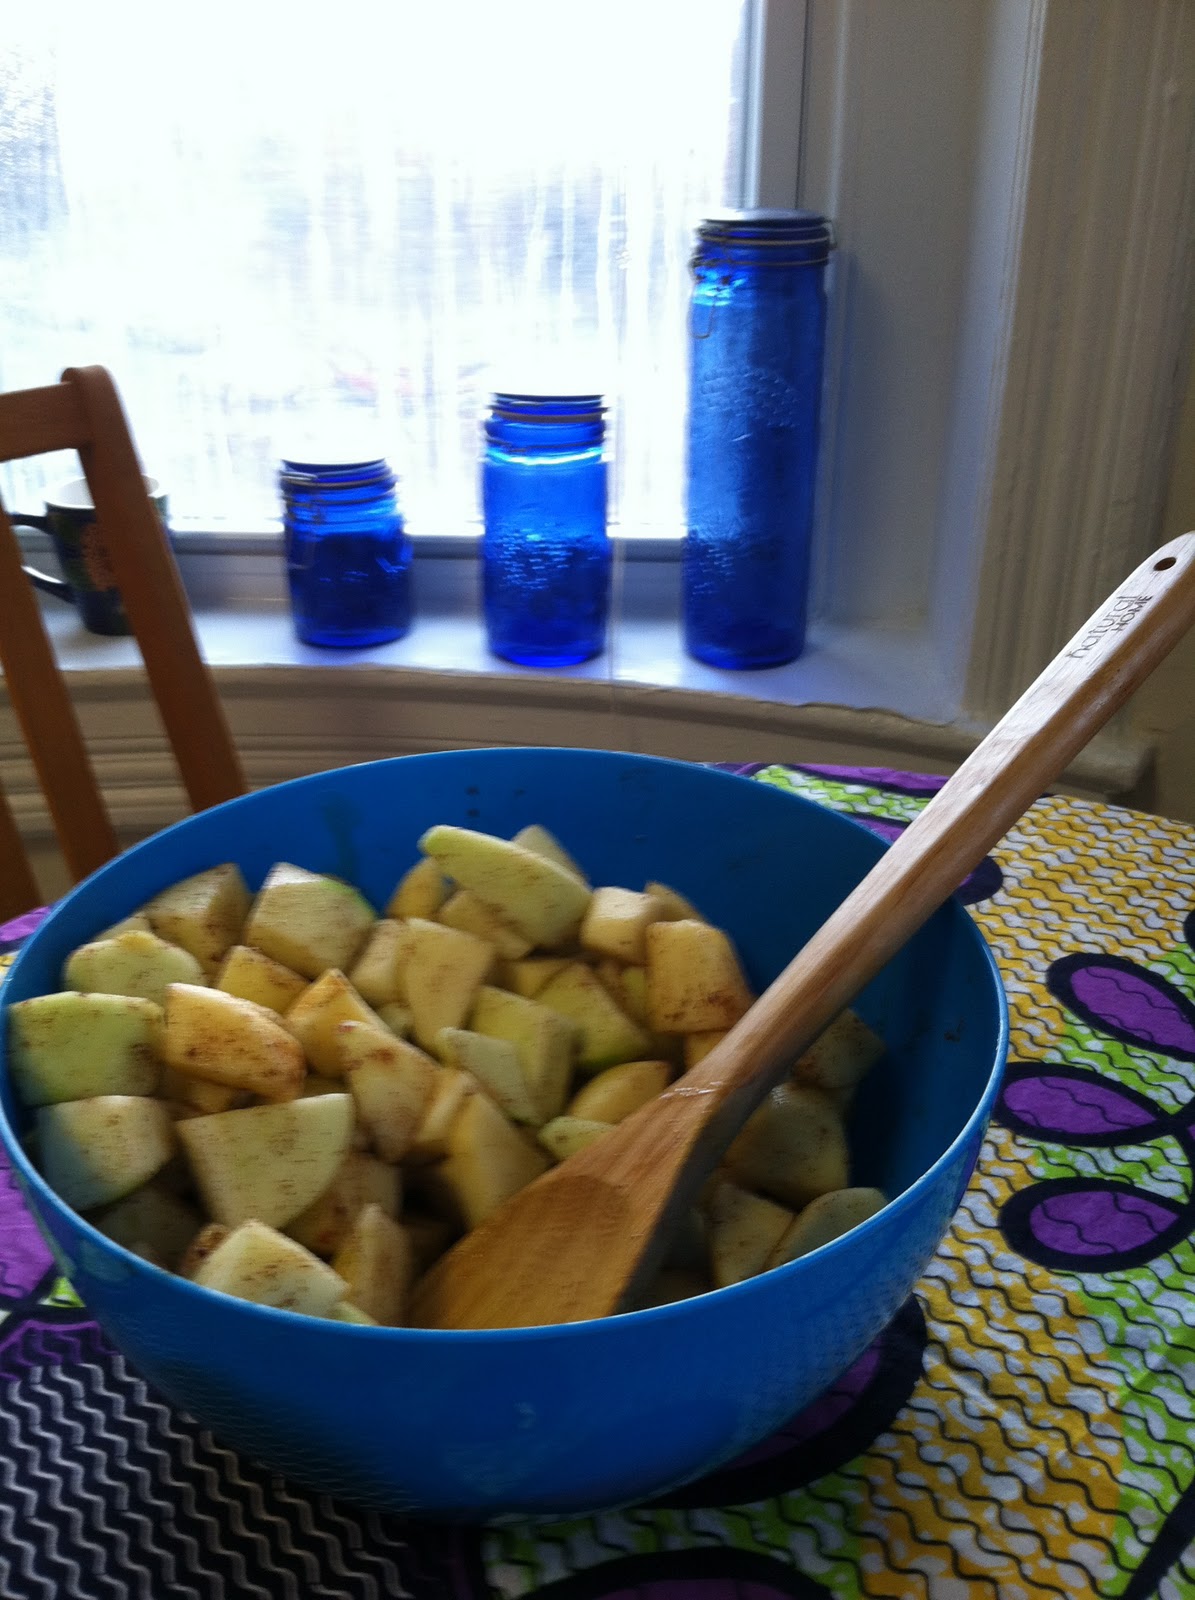
1.  Preheat the oven to 425. Peel and core the apples. This is easier than it sounds-- I used a potato peeler and a knife and it took about 8 minutes. They do not need to be pretty.

2. Mix the lemon juice in with the apples, then mix the spices, then the honey, and then pour the water in. Mix everything around again. 


3. Pour apples into 9 X 13 glass baking pan.  Bake for 40 minutes, stirring apples at halfway point to avoid burnt tops.  Apples will be mushy and more liquid will have formed in pan.


4. Remove from oven, let cool for ten minutes.  Either manually mash apples for a chunkier sauce, or throw everything into the food processor and puree to the consistency you like. (Beware though-- I was LITERALLY licking my food processor because this was so good and those blades are sharp!)


(*unless your mama is like my mama... then maybe you just want to high-five her)
Read More


Return to top of page
Powered By Blogger | Design by Genesis Awesome | Blogger Template by Lord HTML